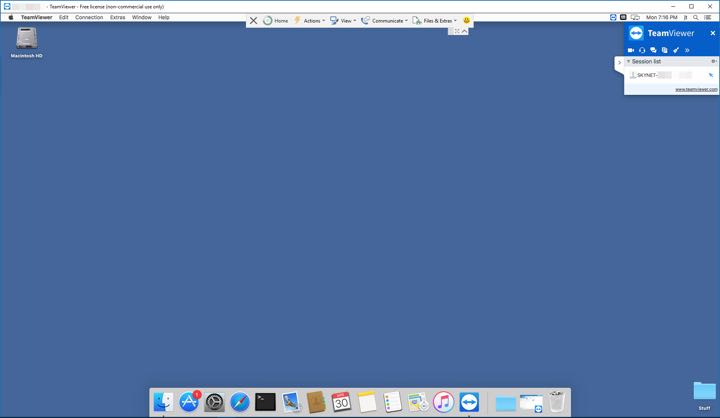
This tutorial is going to walk you through the entire process of installing Teamviewer on your PC and macOS. Please be sure to only utilize TeamViewer for non commercial use while utilizing it as freeware. I personally enjoy this application and connect to my macOS VPS from my mobile device and tablet all the time. I love the fast connection and the ability to up or downscale the quality while working. Please be sure to only utilize this software for commerical purposes with a paid license to avoid any software restrictions moving forward. Scroll down and lets begin.
Downloading TeamViewer on macOS VPS
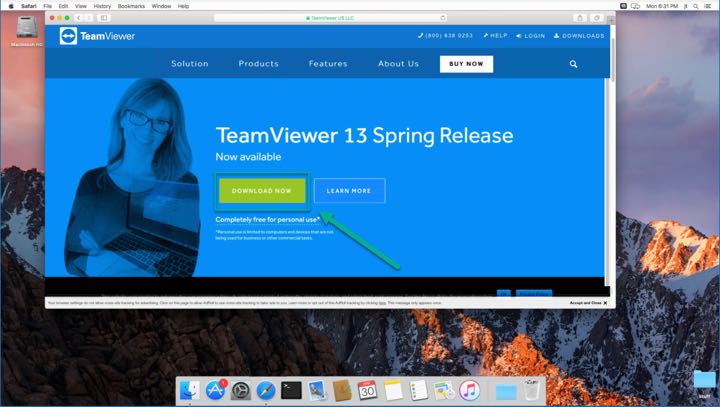
- Navigate your safari browser to www.teamviewer.com
- Select “Download Now” in the green box.
Installing TeamViewer on macOS VPS
- Begin by opening the “TeamViewer.dmg” file.
- Double click the “Install TeamViewer” logo.
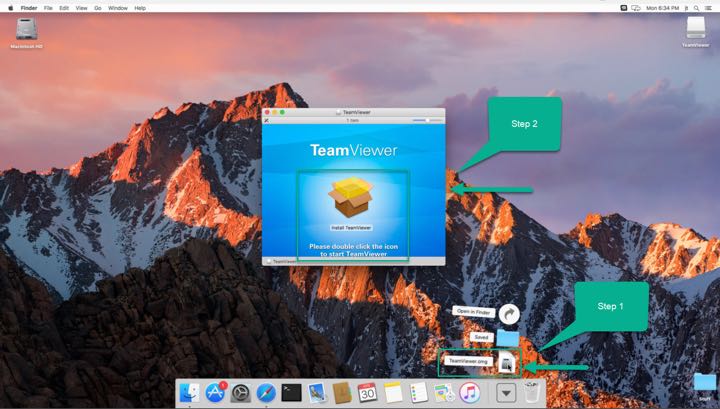
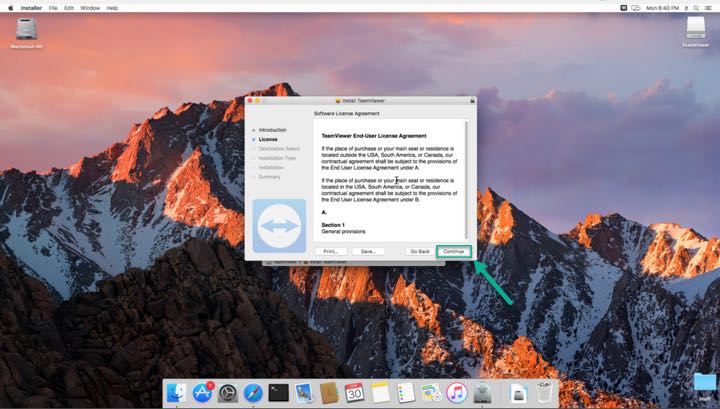
- Select “Continue” to begin the installation.
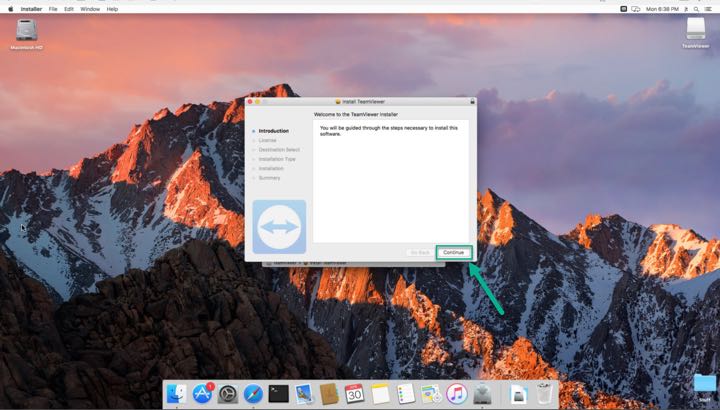
- Select “Continue” and Accept the End-User License Agreement.
- Select “Install“.

- Once the install is complete select “Close“.
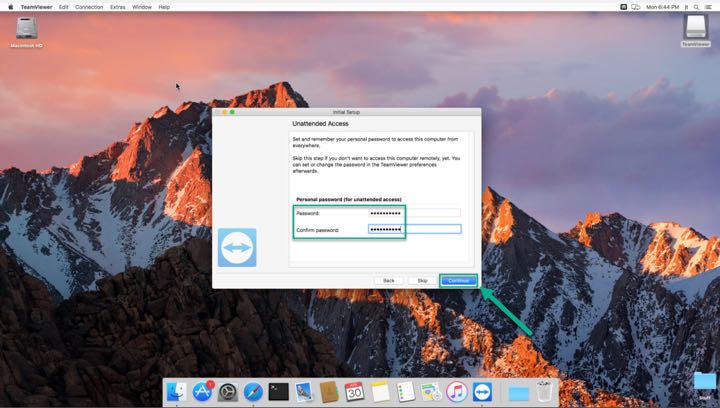
- On the second pop window labeled “Initial Setup” select “Continue“.

- Create a password for your new remote connection.
- Once your setup is complete, select “Finish“.

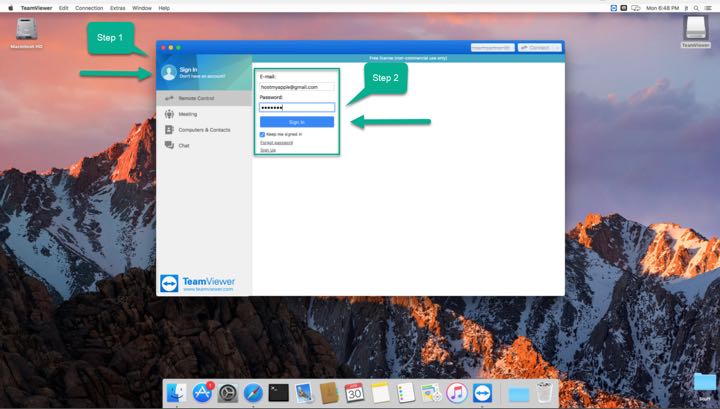
- Login to your newly installed TeamViewer application.
- If you do not have a TeamViewer login, Not to worry I will show you how to set one up in the PC install.
- Simply come back to this screen and login after you have completed the PC TeamViewer install.
Installing TeamViewer on PC
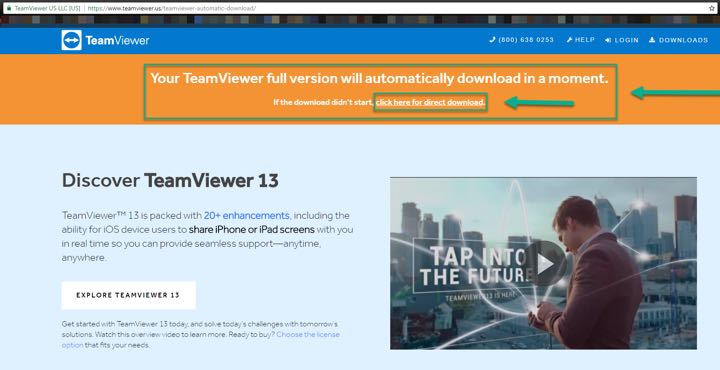
- Navigate your browser to www.teamviewer.us/downloads/
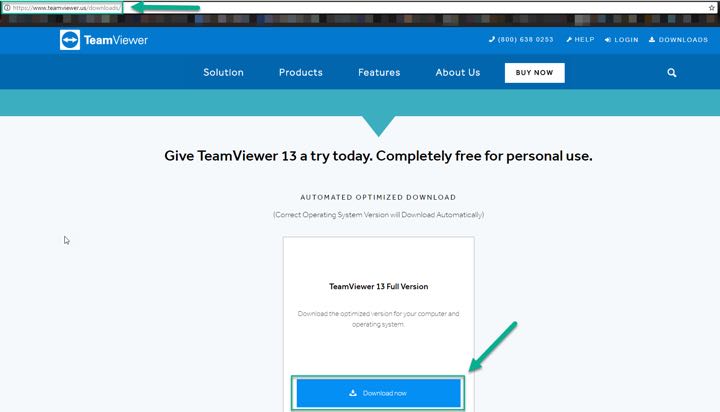
- Be sure to disable any pop up windows.
- If you do not see a download prompt, simply select “Click here for direct download“.
- When you run/open your install file be sure to put a radio button by “Installation to access this computer remotely (unattended)” and “Personal/Non-Commercial” Use or any of the other usage options.

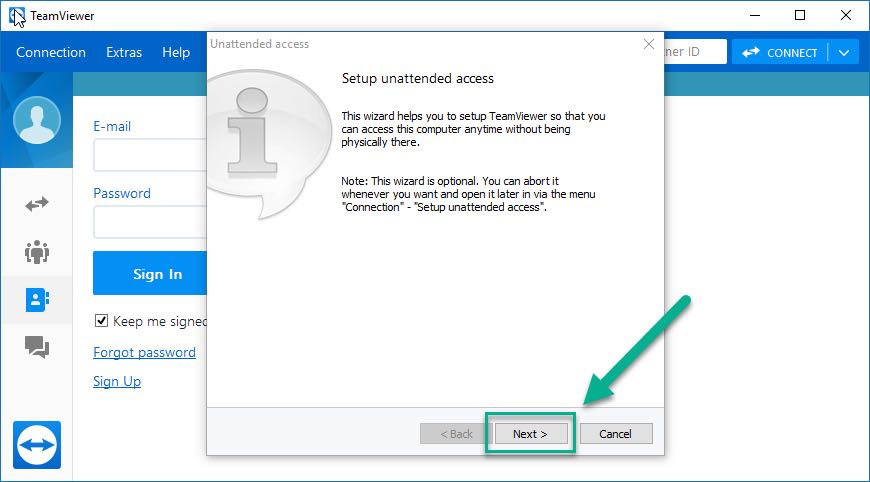
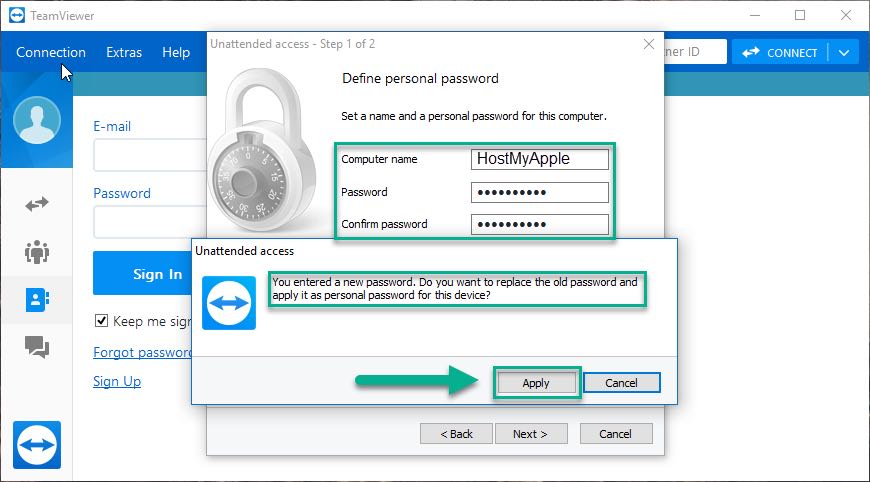
- Define a Personal Password for Unattended Access.
- Select “Create a free TeamViewer account” or “I already have a TeamViewer account” if you already have a login.
- Generate a name for the TeamViewer Remote Connection.
- Type in your password and confirm your password, once complete select “Next“.

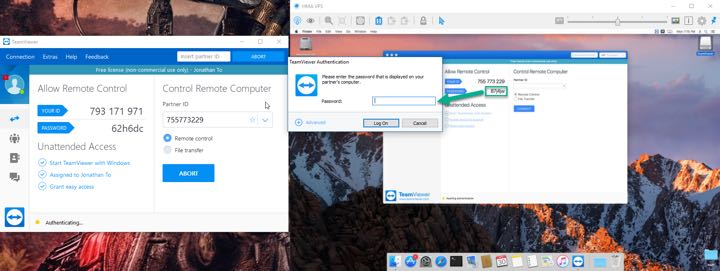
- Take the “Your ID” character combo from your macOS VPS instance and put that in your “Partner ID” field on your PC.
- Select “Connect” once you have completed this step.
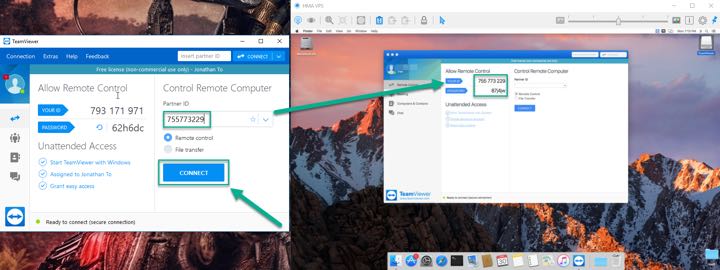
- TeamViewer Authentication on your PC instance is requesting the password listed on your macOS VPS instance.
- See the green box I highlighted and apply that password into the Authentication field.
- Select “Log On” once you have put in your password.
- Setup is now complete.
- You are officially connected to your macOS VPS instance through your PC.
- Simply download the mobile app to any mobile device or tablet with your TeamViewer login and you can now expand your connection ability even further.
